The Room & Audio Visual System
|
|
For Help!
Contact either
Steve R NarfLecture Demonstration |
Jim ReardonDirector of |
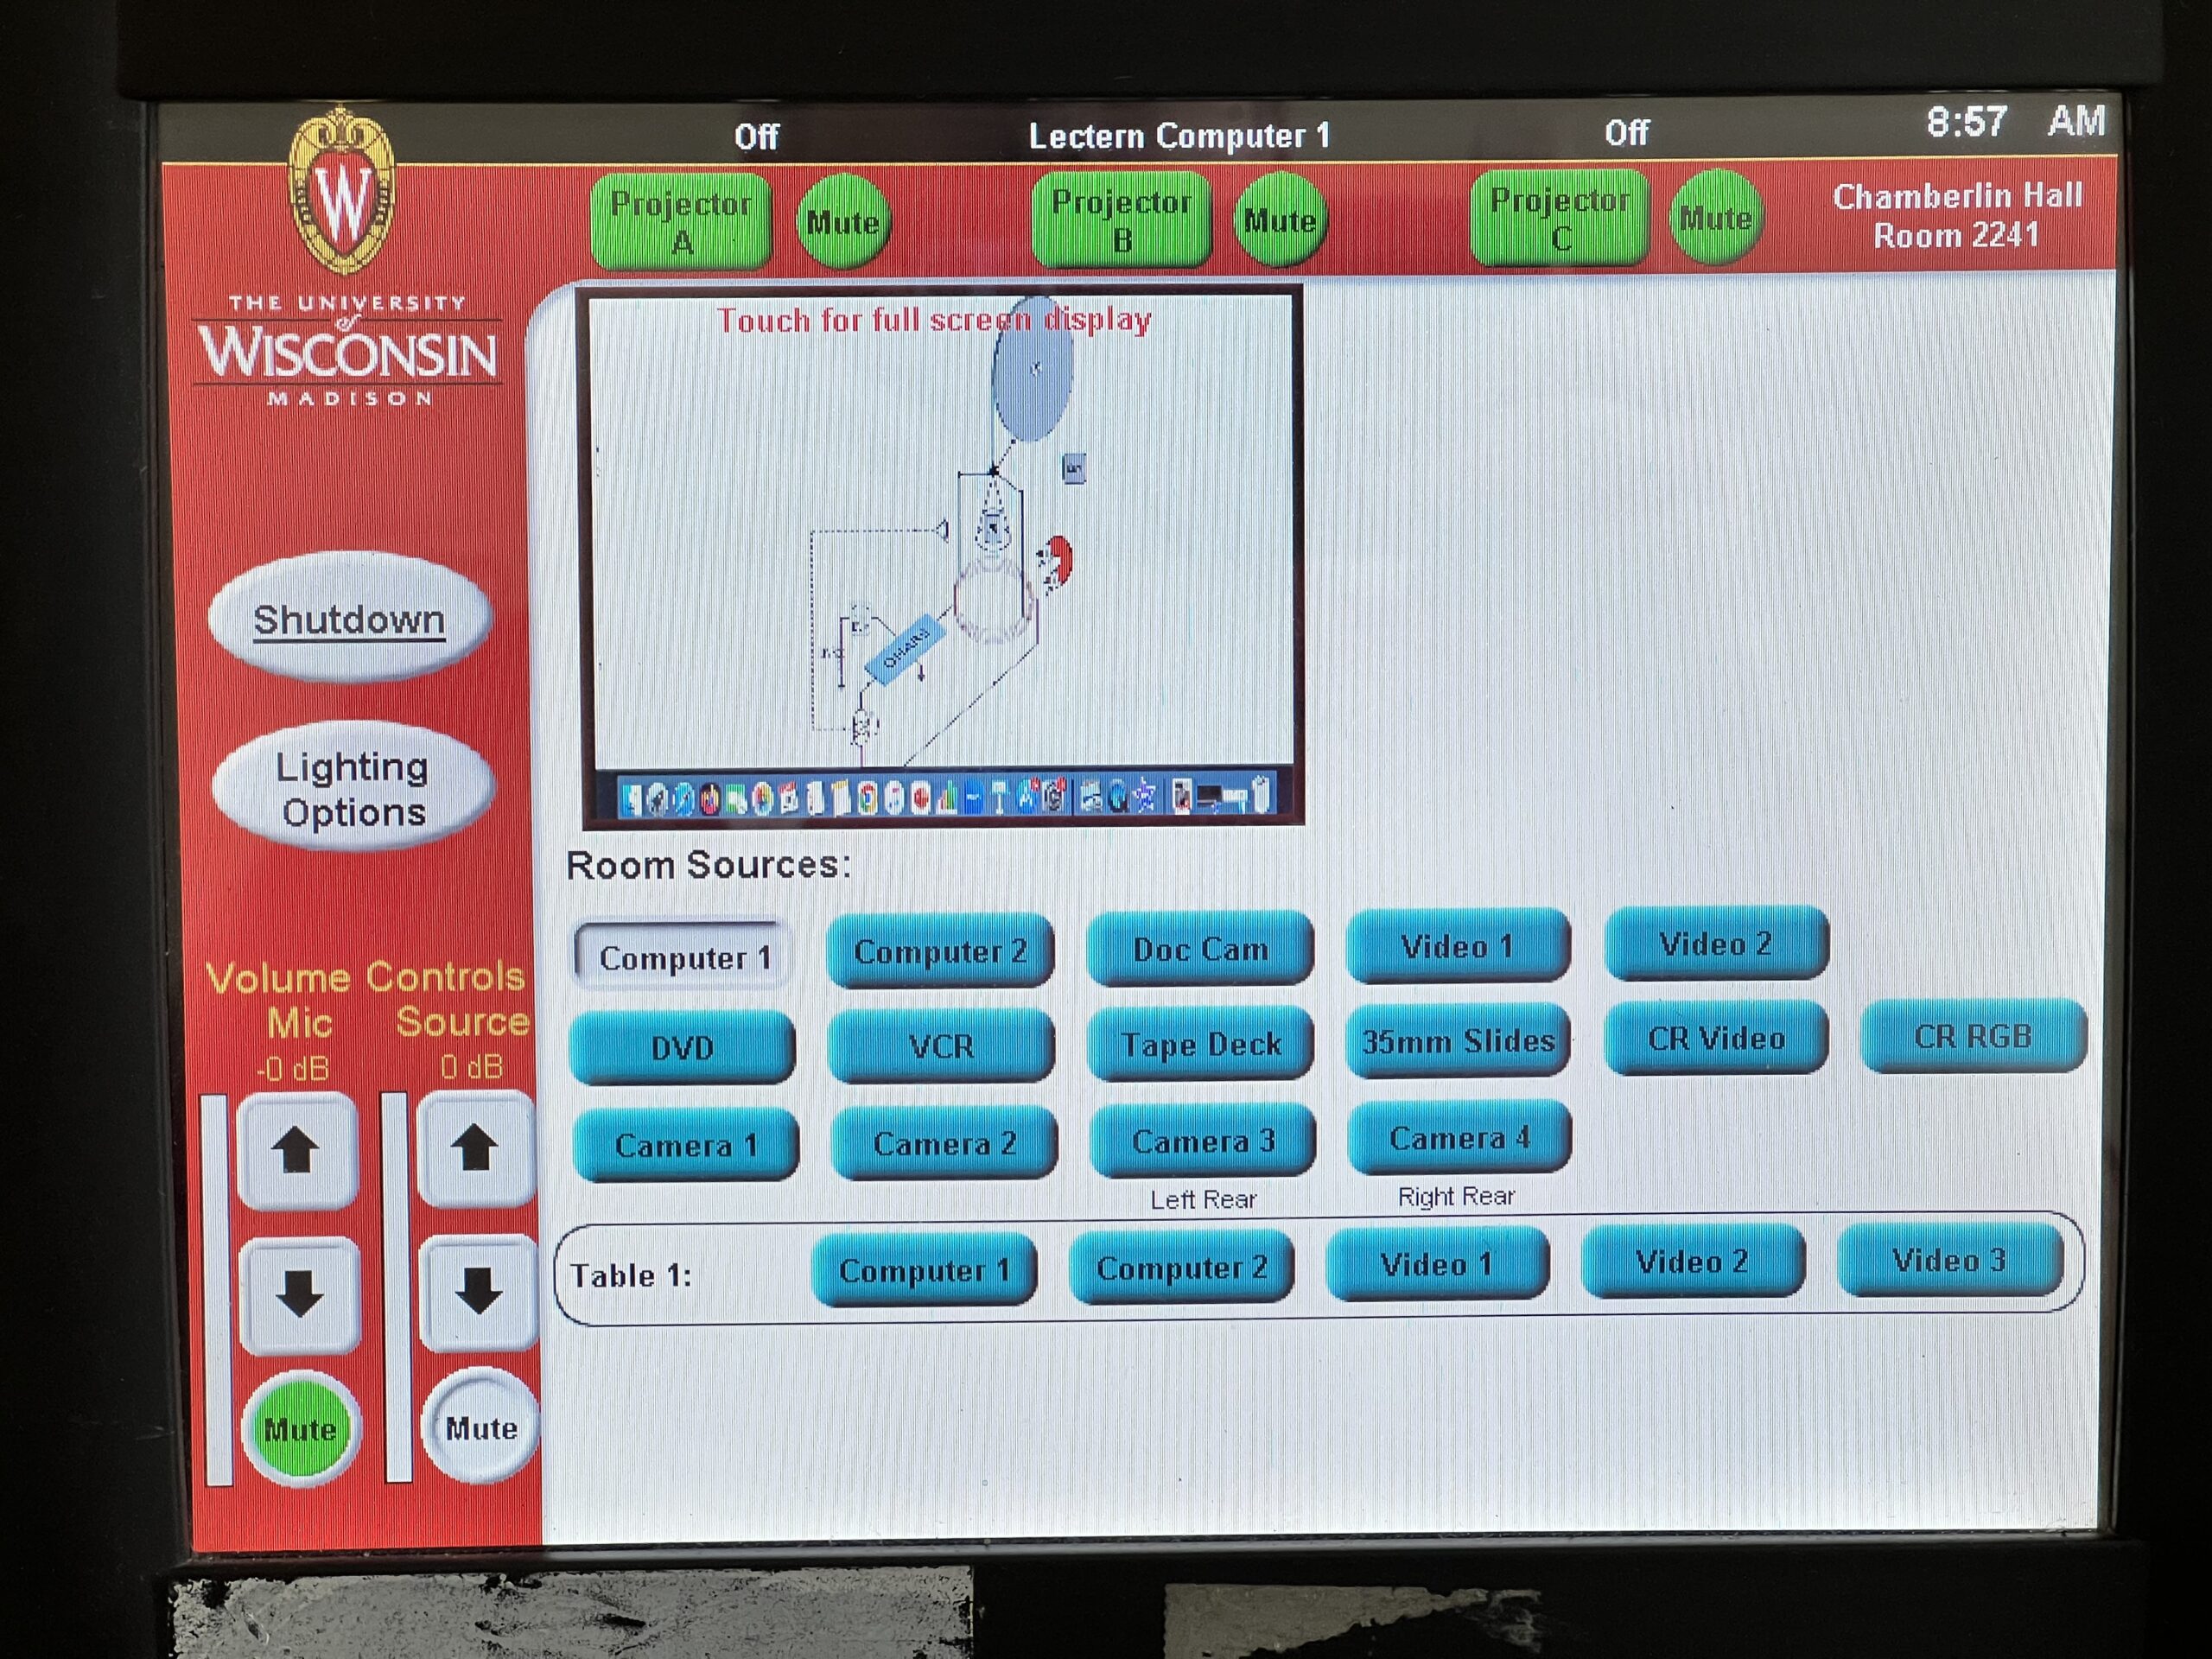
Crestron Startup:
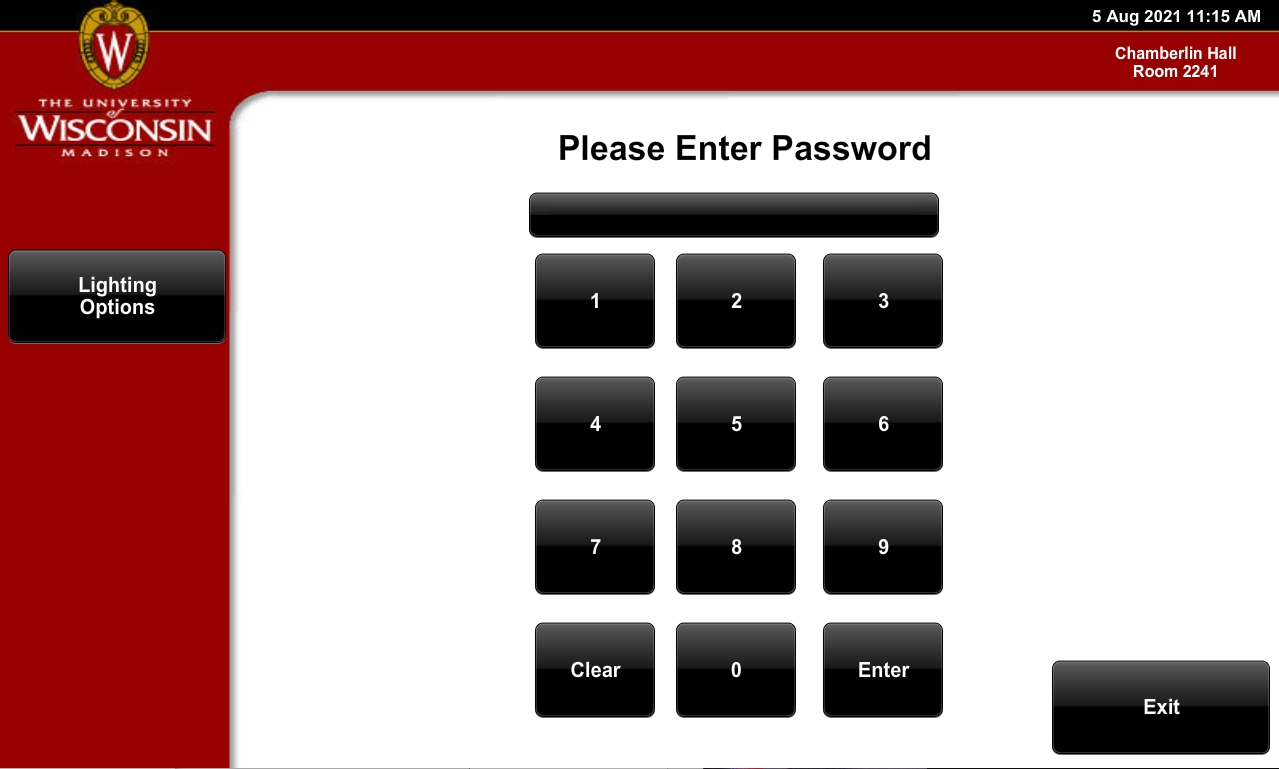
- The touch screen — The screen maybe dark (ie. asleep) and will require you to touch the screen “once” to wake it up. (see image) You will then need to touch the screen a second time to acquire the log-in screen. (see image)
- Note: Your campus 6 digit AV pass-code and keys will not work within our rooms. They are for AMX general assignment rooms only.
- Enter the 4 digit pass-code that is given out by the physics department.
Connecting a computer to our Crestron system:
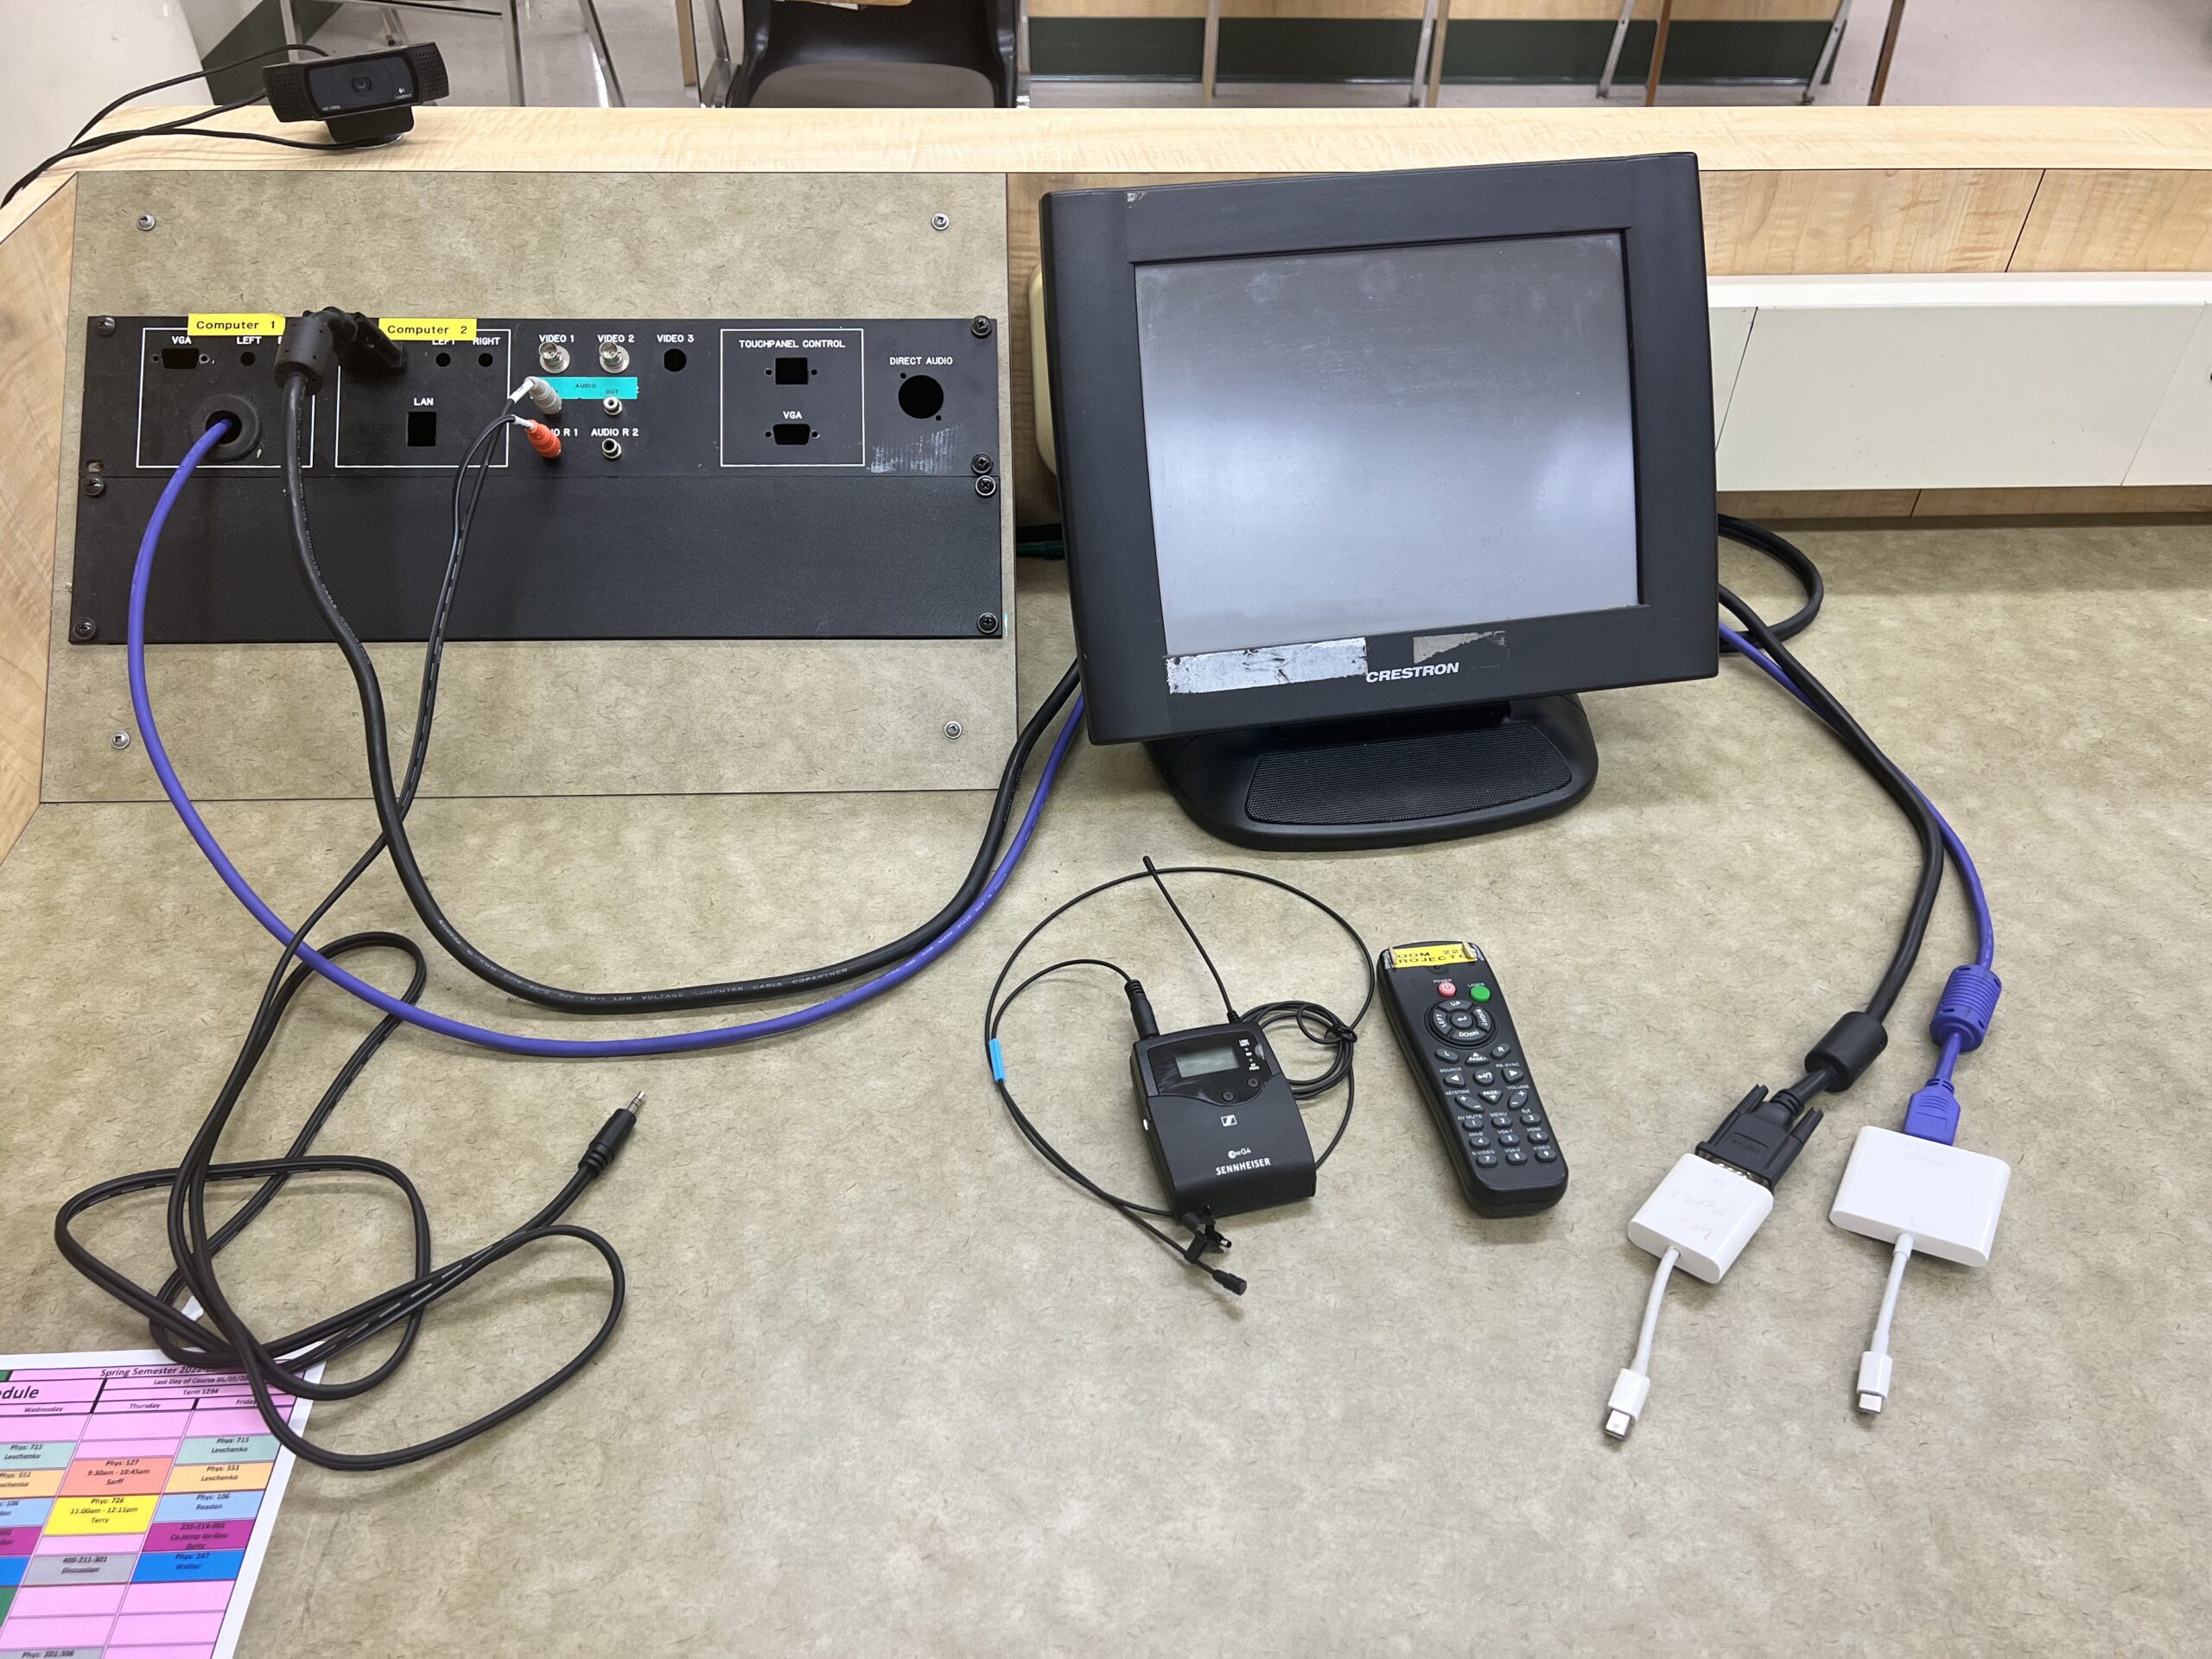
- Connect your computer to the system by using either the HDMI or VGA cable that are provided for you on the left-hand-side of the lectern. (See image) Even though there’s an HDMI cable here — “sound” will not travel out the HDMI cord to the speakers.
- Note: a USBC or mac adapter is often needed, we have several adapters available for use. The most common ones should be at the lectern.
- Special note: See Image to see which buttons work and which buttons do not work.
- See images: Before connected and After connected using the HDMI cable.
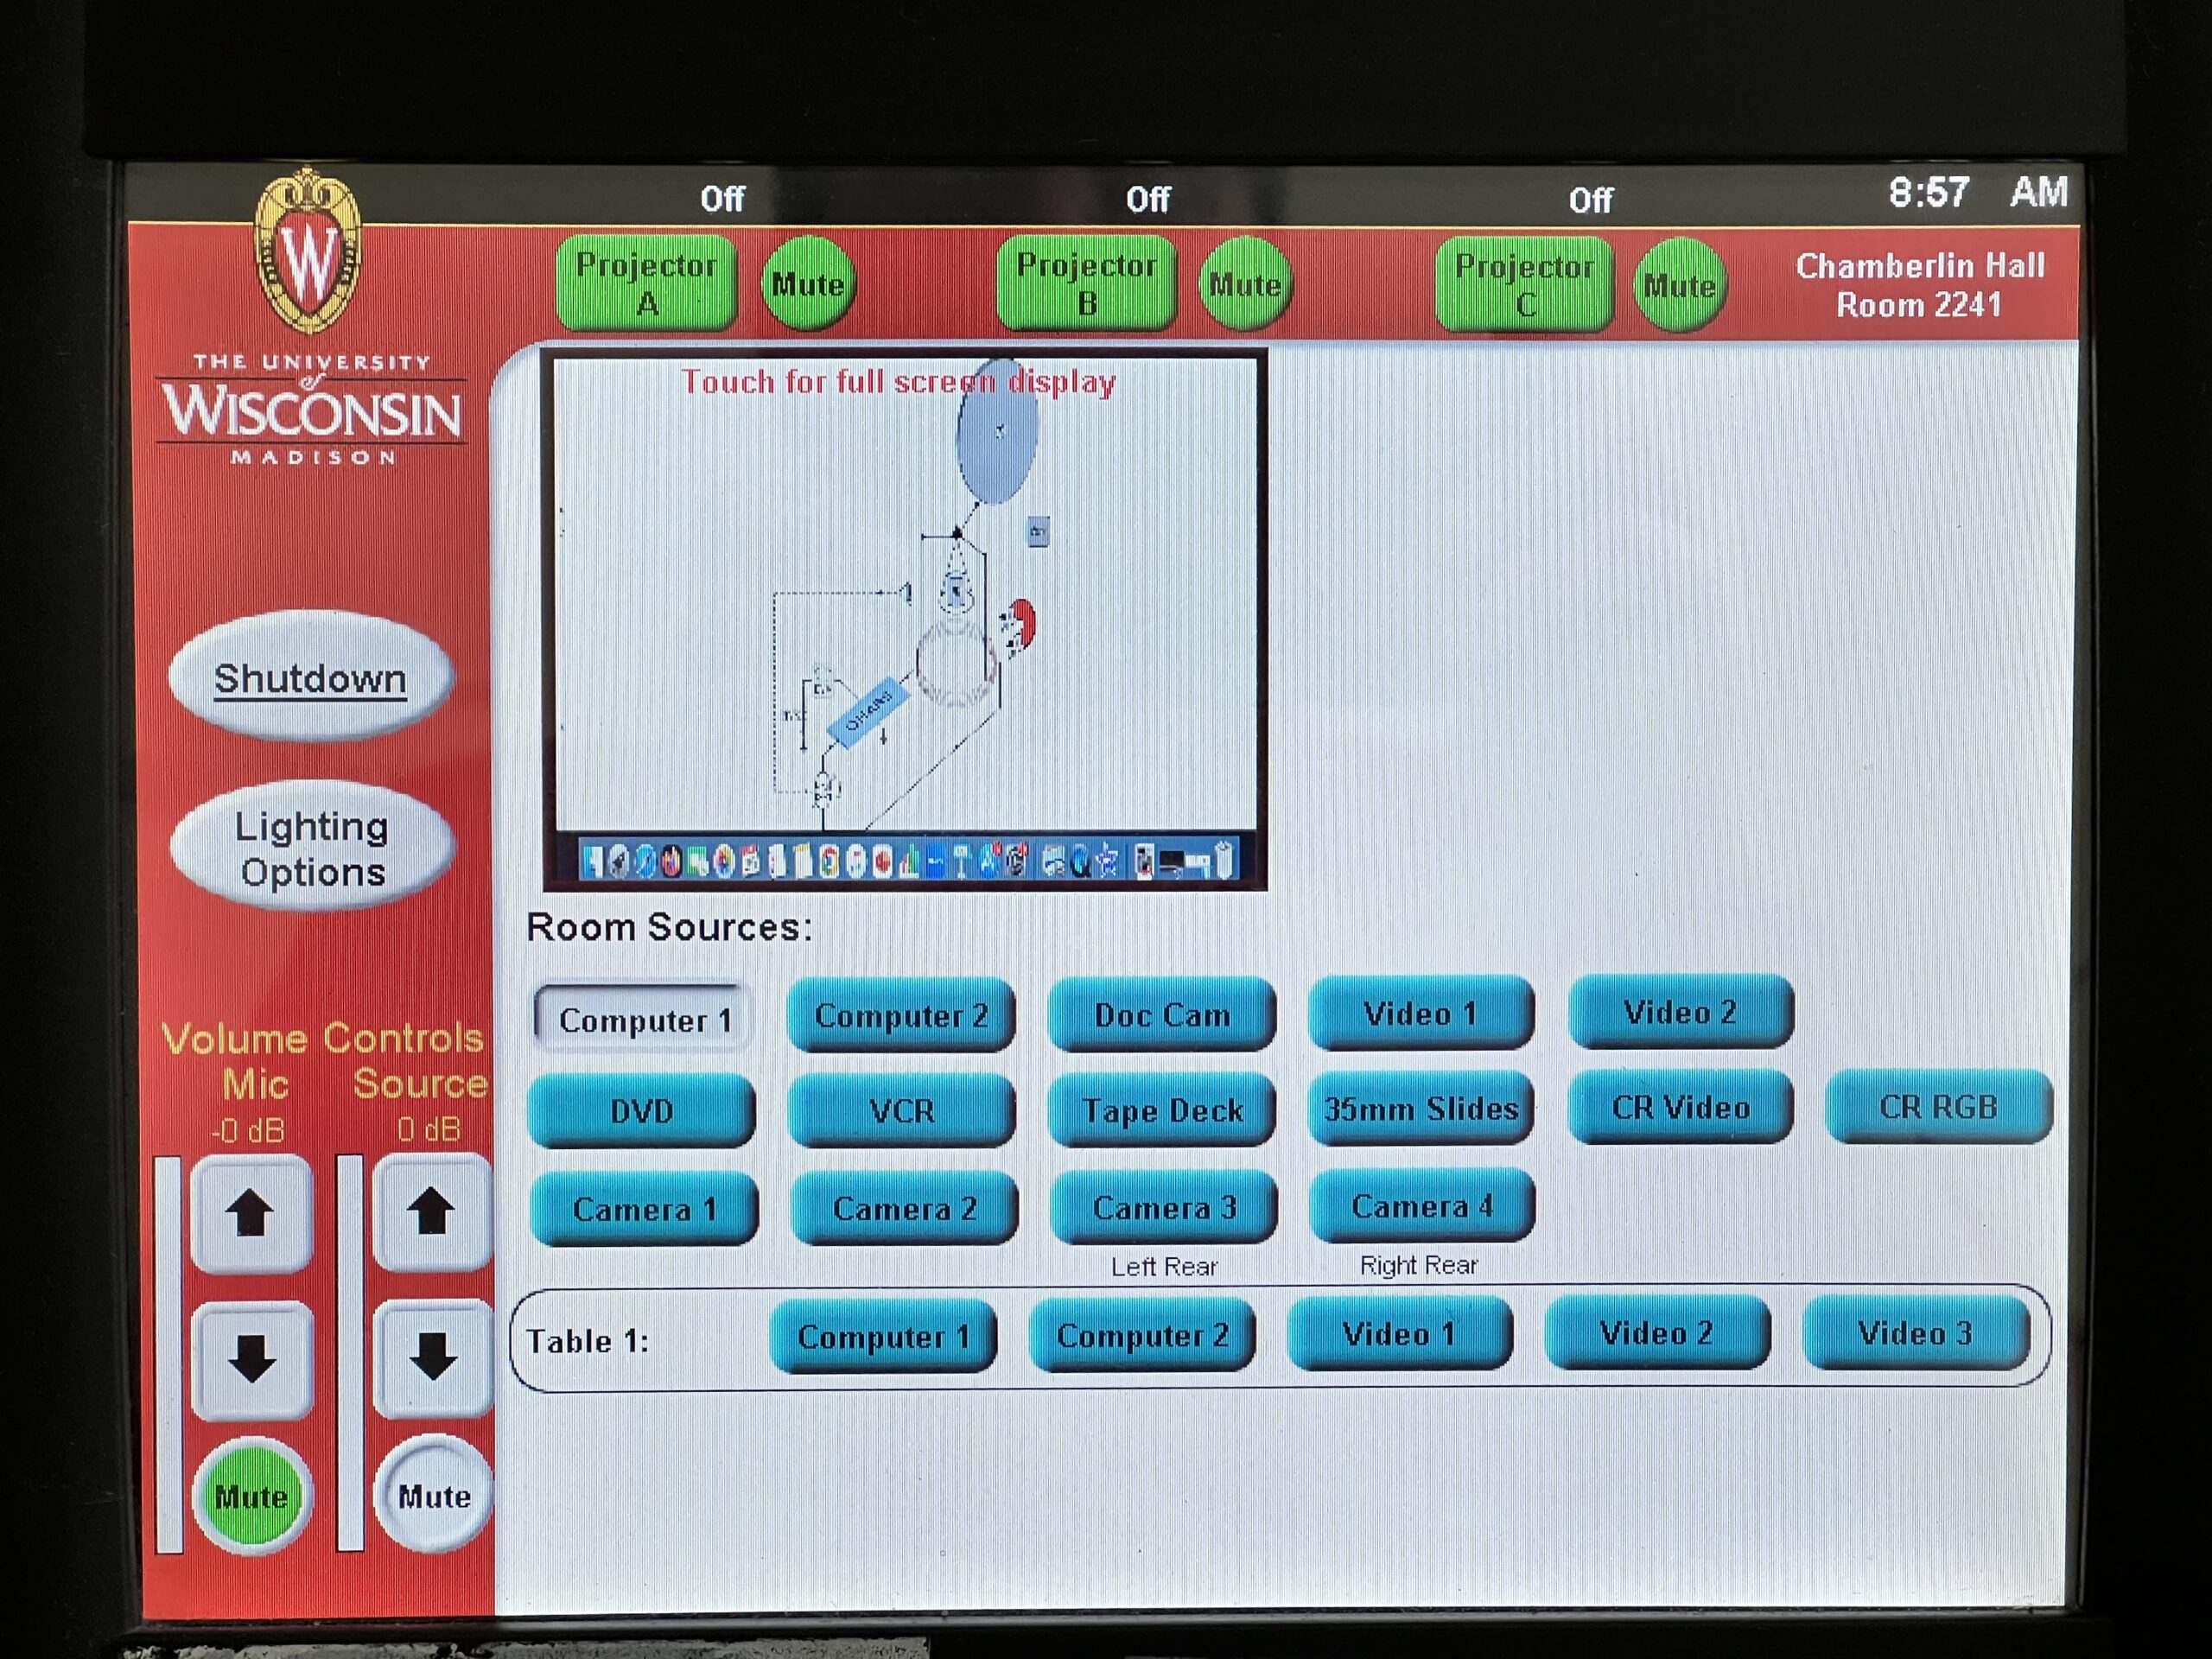
- Select by pushing either the “Computer 1” or Computer 2” button within the “Room Sources” box. The button will change from from a raised blueish button to a dimpled grayish.
- Your computer display should now appear on the Crestron touch screen preview window located just above the room source buttons. (See image). If it doesn’t you might be on the other input cable.
- Once you have your display showing on the preview, you now must send it to a projector.
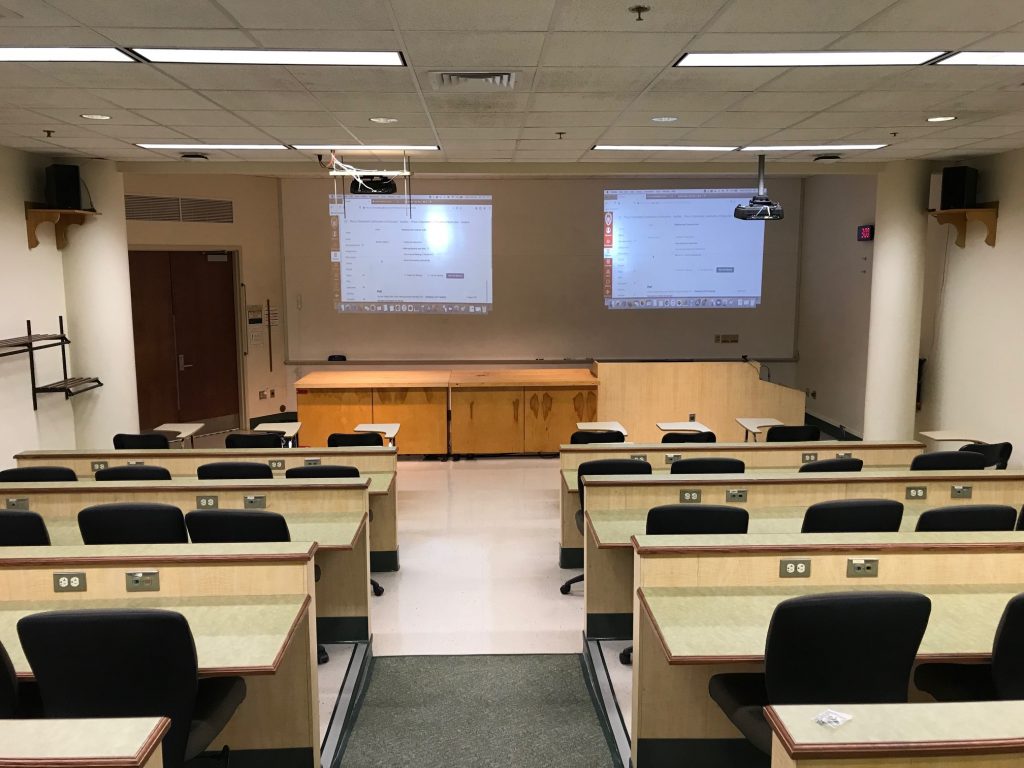
- This is your choice, but the best projector is Projector B. (See image)
- Do this by pushing the “Projector B” button located at top-center of the Crestron touch screen. (See image)
- The Projector B button’s label that is just above it, will change to whichever source button that was sent last. In this case it should read “Computer 1” -(note, please ignore the fact that the above image states HDMI 1)
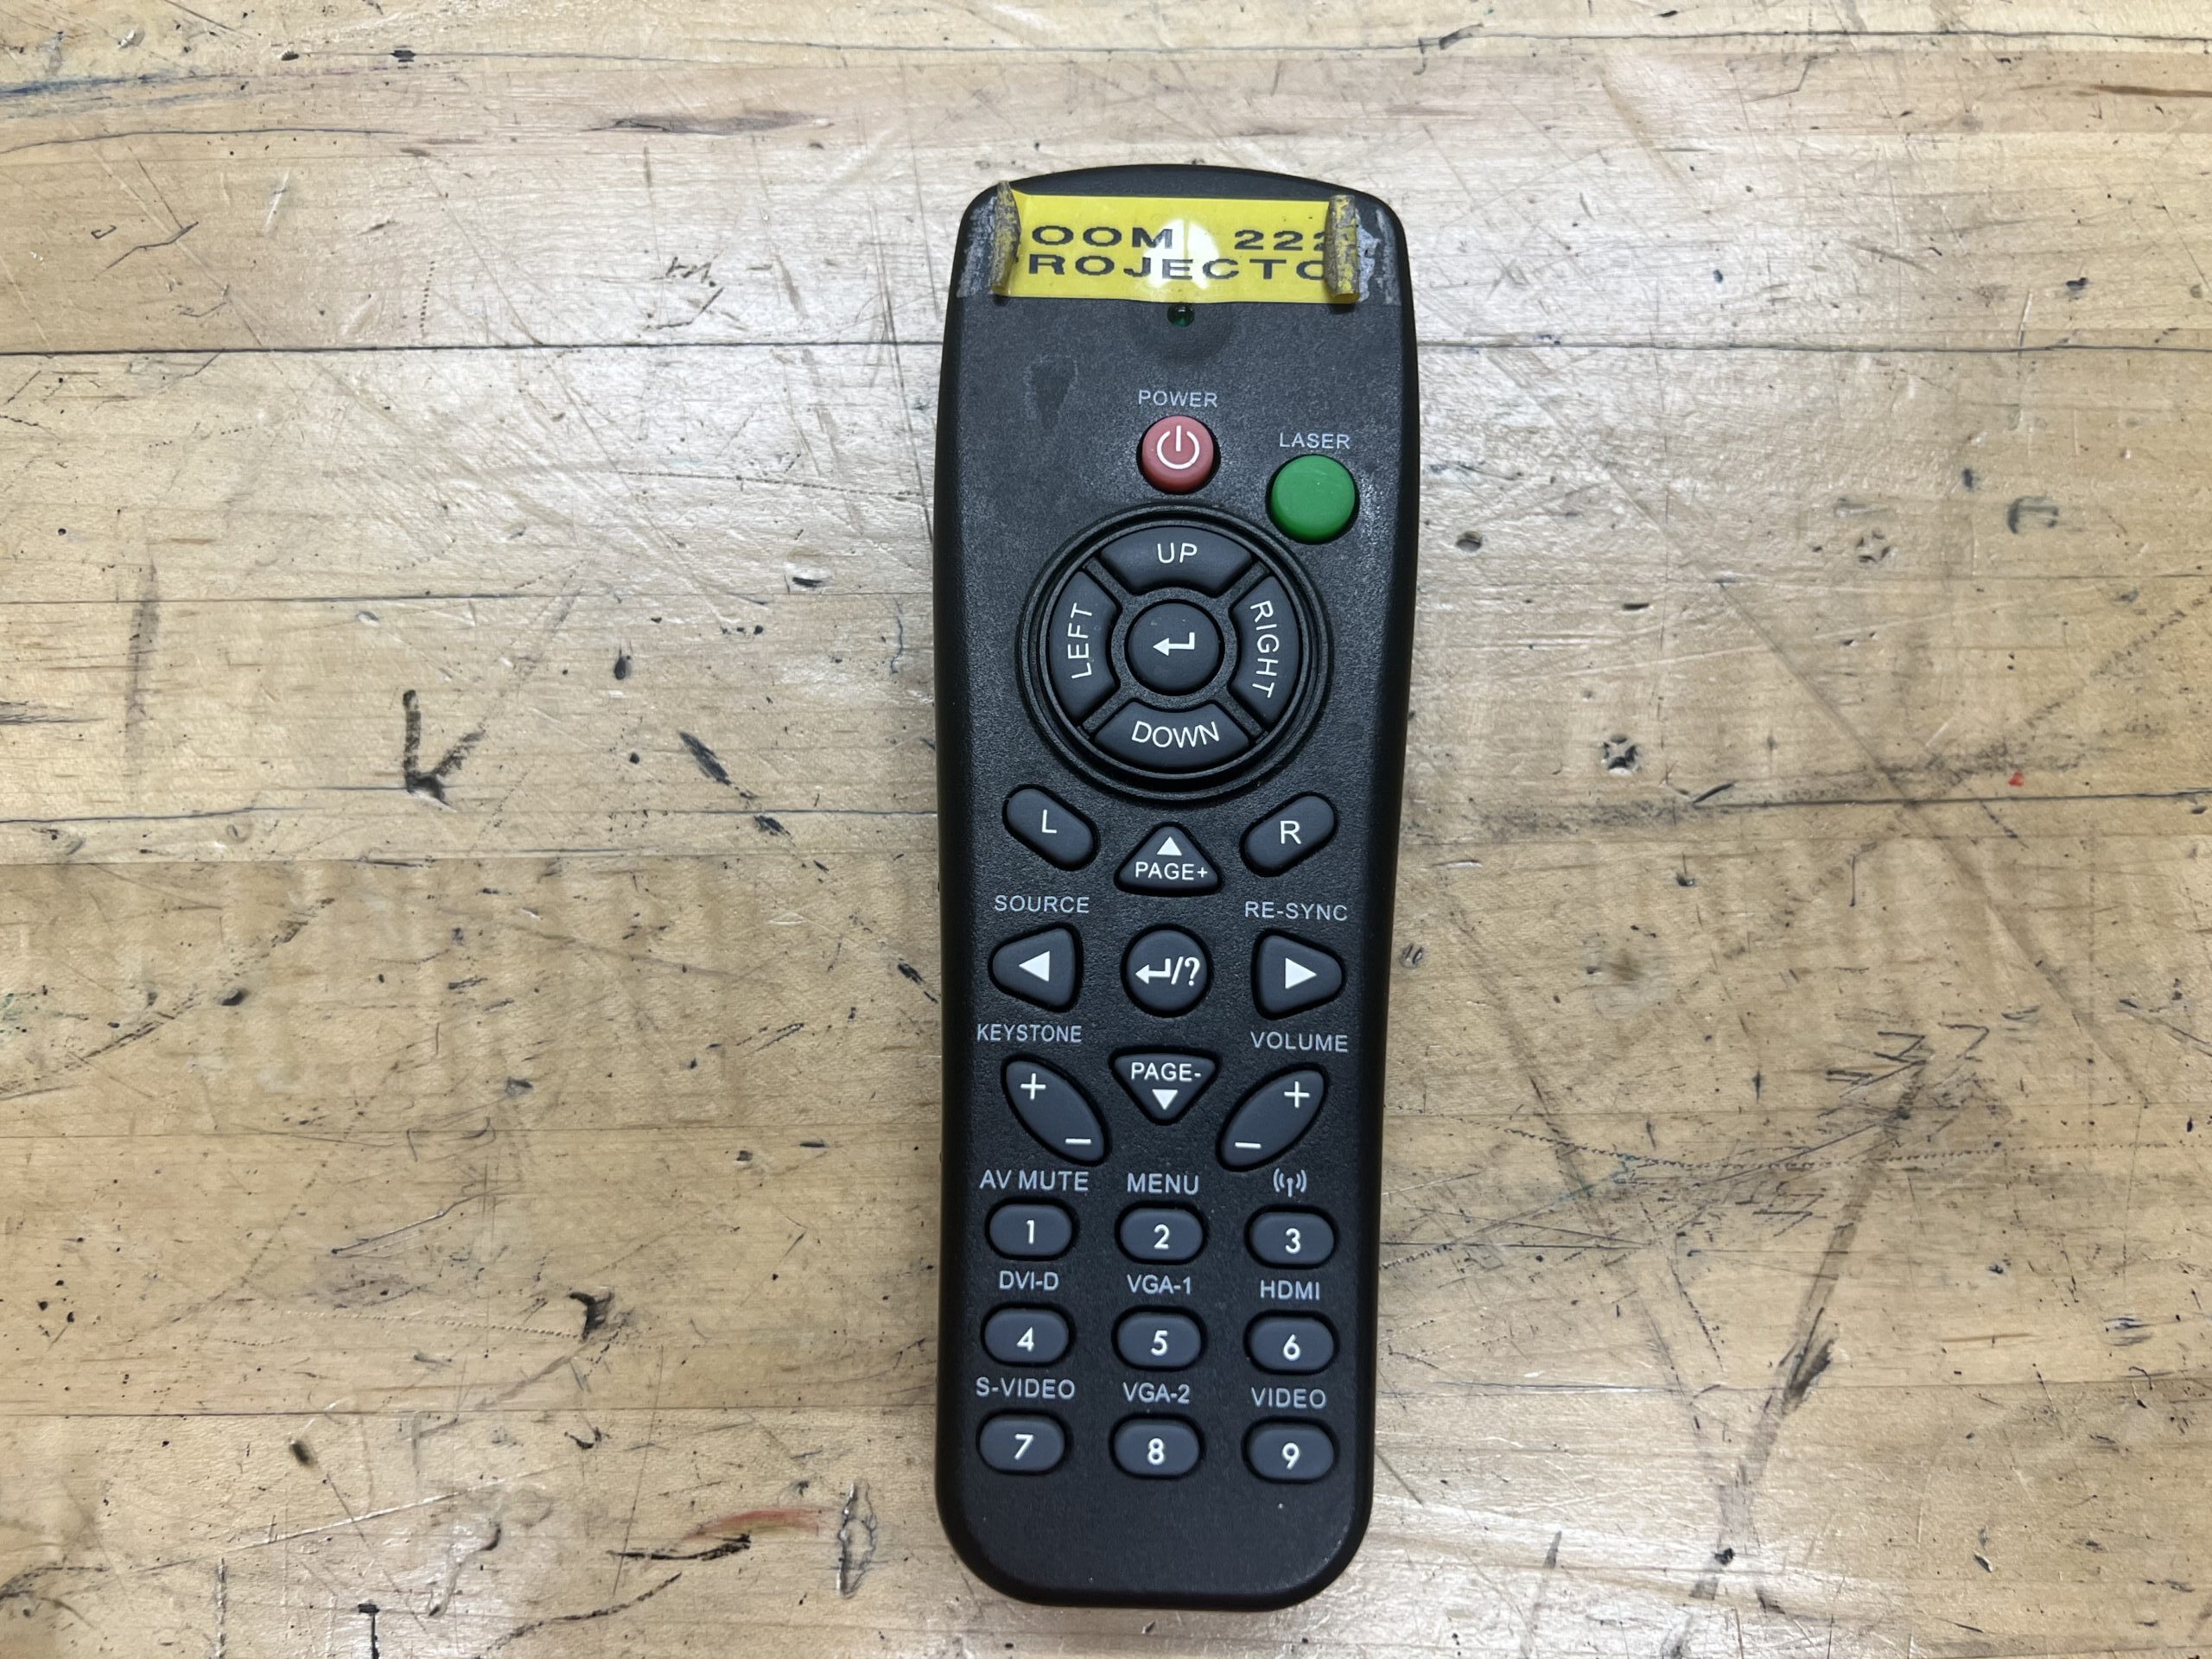
- NOTE: projectors must be turned on manually.
- Projectors A & B are located on the ceiling just in front of the lecture demo benches.
- First fine the remote control that should be on the table or lectern area. (See image)
- Then point it directly underneath the projector
- Then push and hold the power button for a second or so.
- You should be able to see a white light coming from projector’s lens (its self).
- When the projector starts to project, the the source signal “VGA-1” should appear in the bottom right hand corner. If something else appears like HDMI or video, you will have to switch it back to VGA by pushing the number 5 button on the remote control as you pointed at the projector. This should reset it back to VGA-1.
- The projectors do have “AV mutes”, you have to use the remote control again and then toggle the number 1 button to turn the mute no/off.
- Please note both projectors use the same remote control and you might accidentally turn on both projectors.
- There is a small time delay when you do any switching of singles to the projectors.
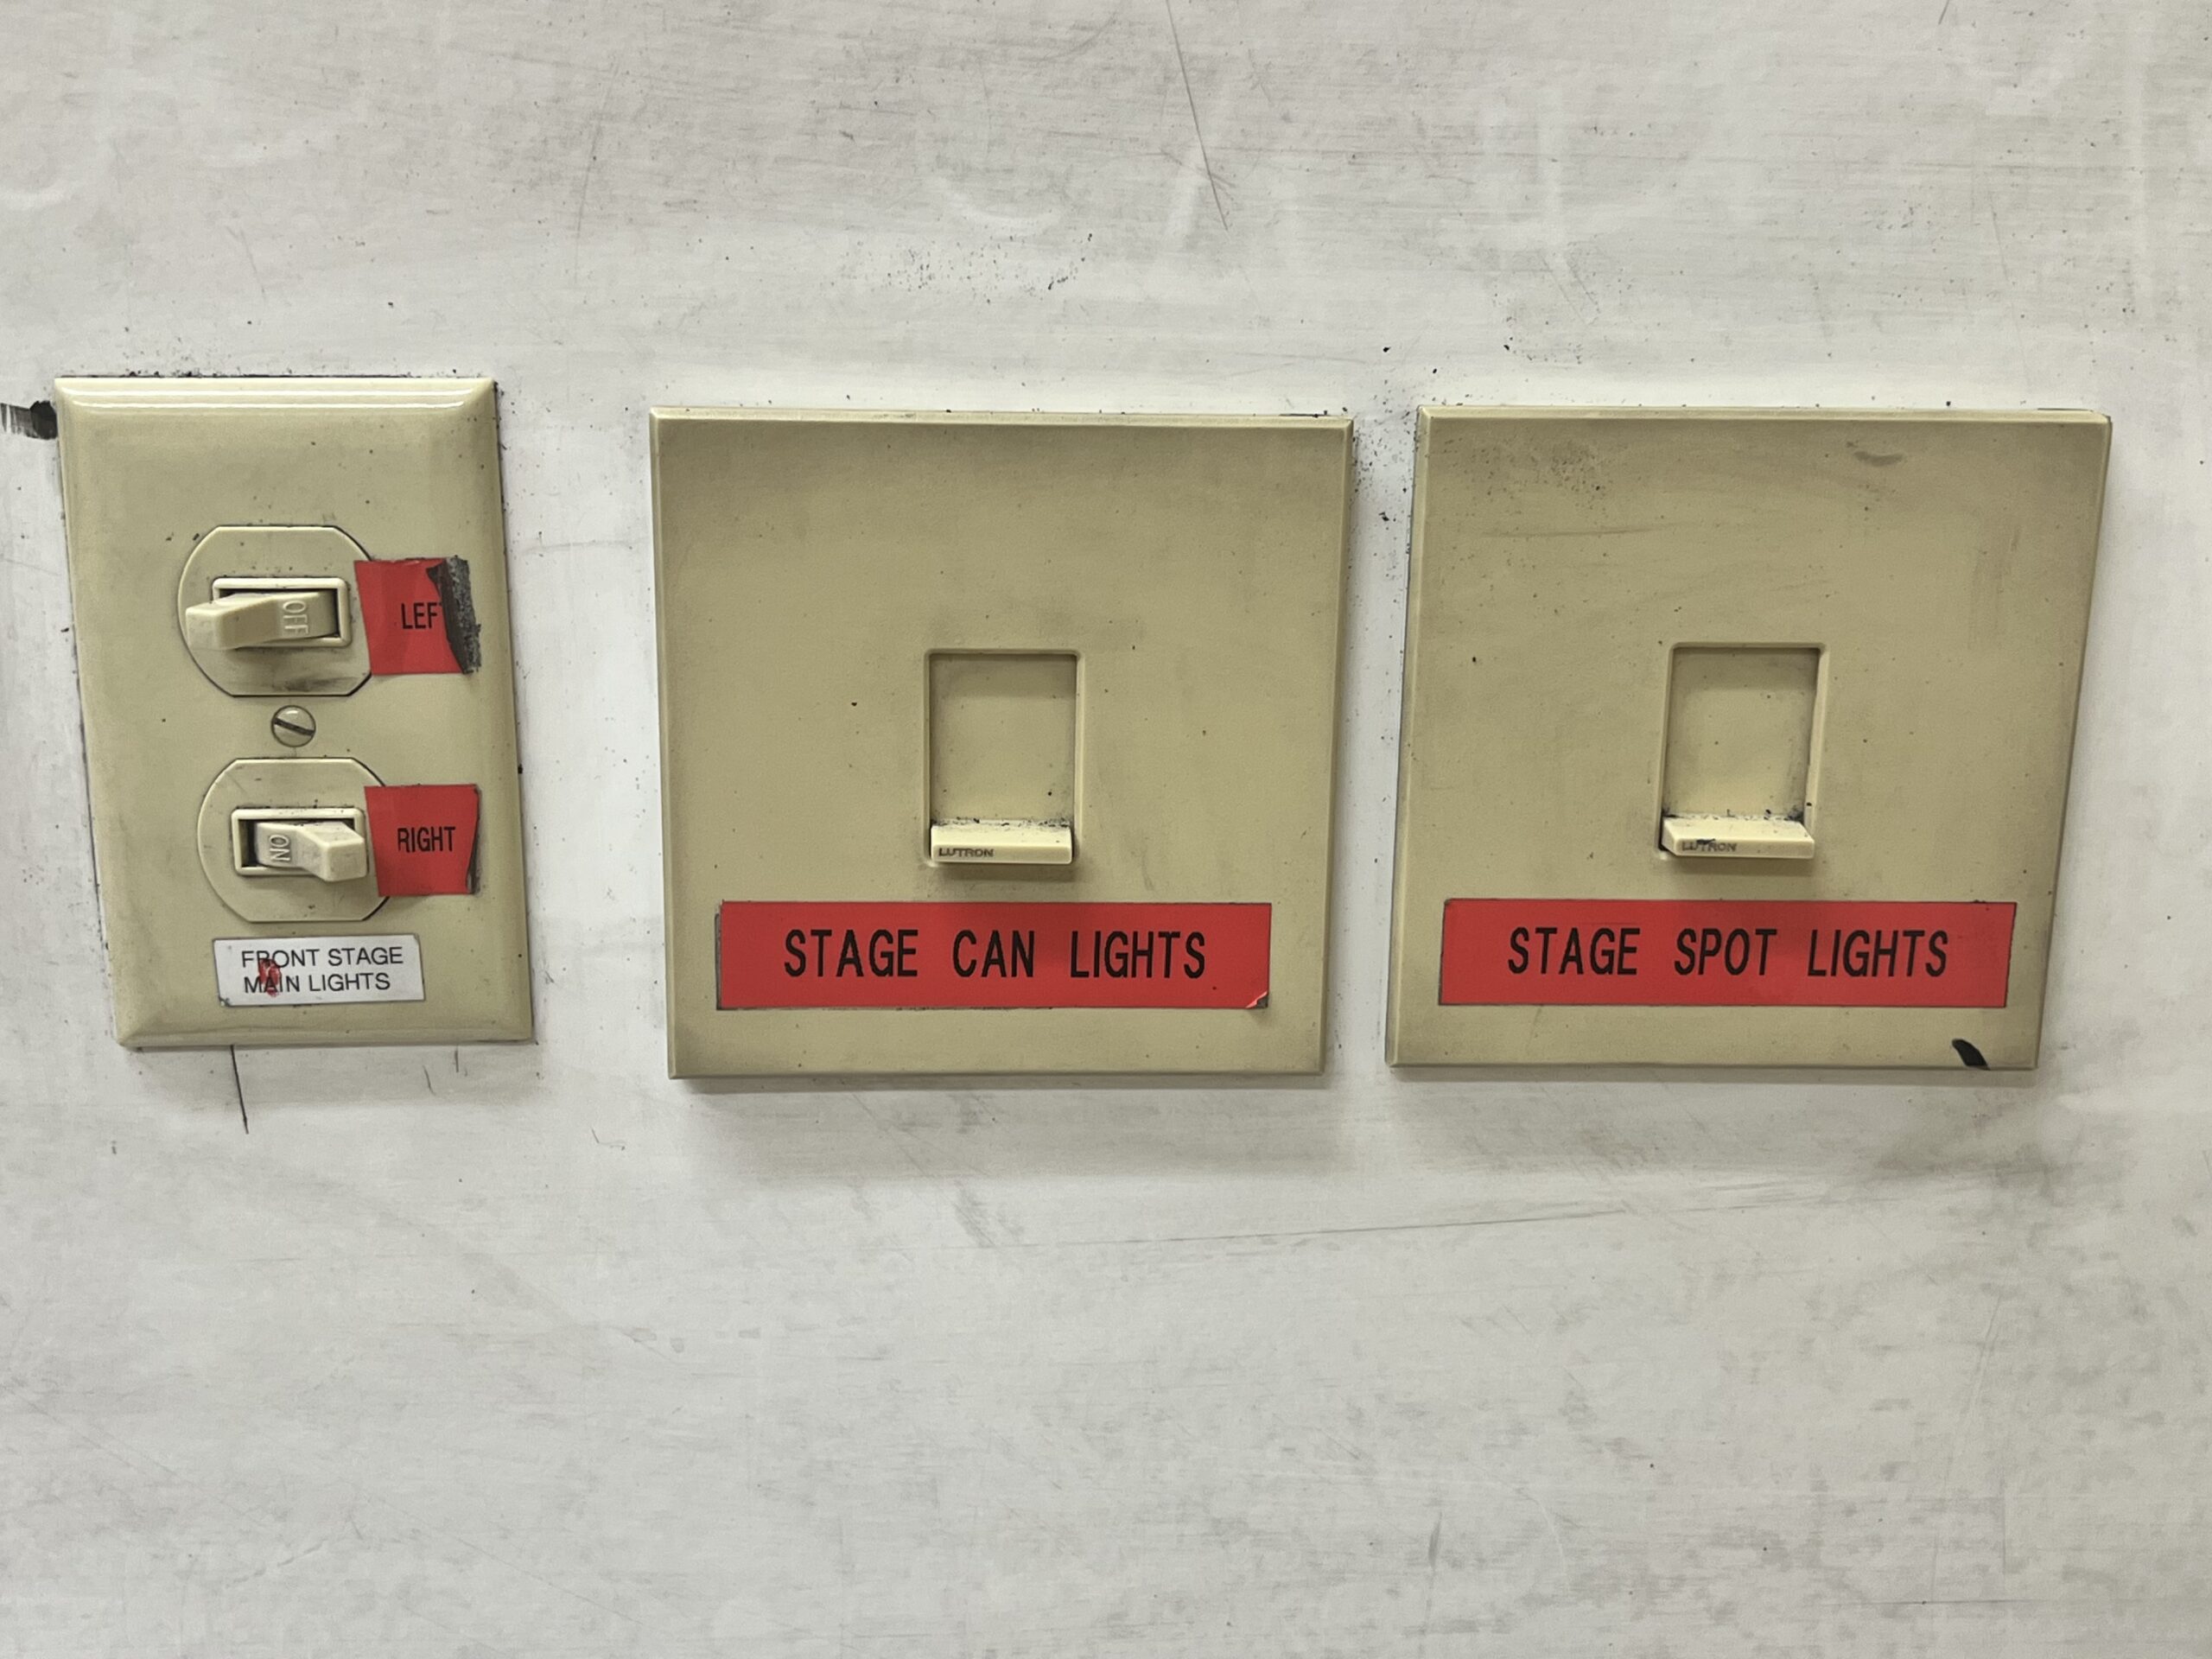
- All lighting in the room is manual, switches are located by the whiteboard and by the main entrance.
The PA System:
- The touch screen — on the left hand margin you will see volume controls that are labeled “Program” and “Microphone”.
- Note: These two controls will most not work!!
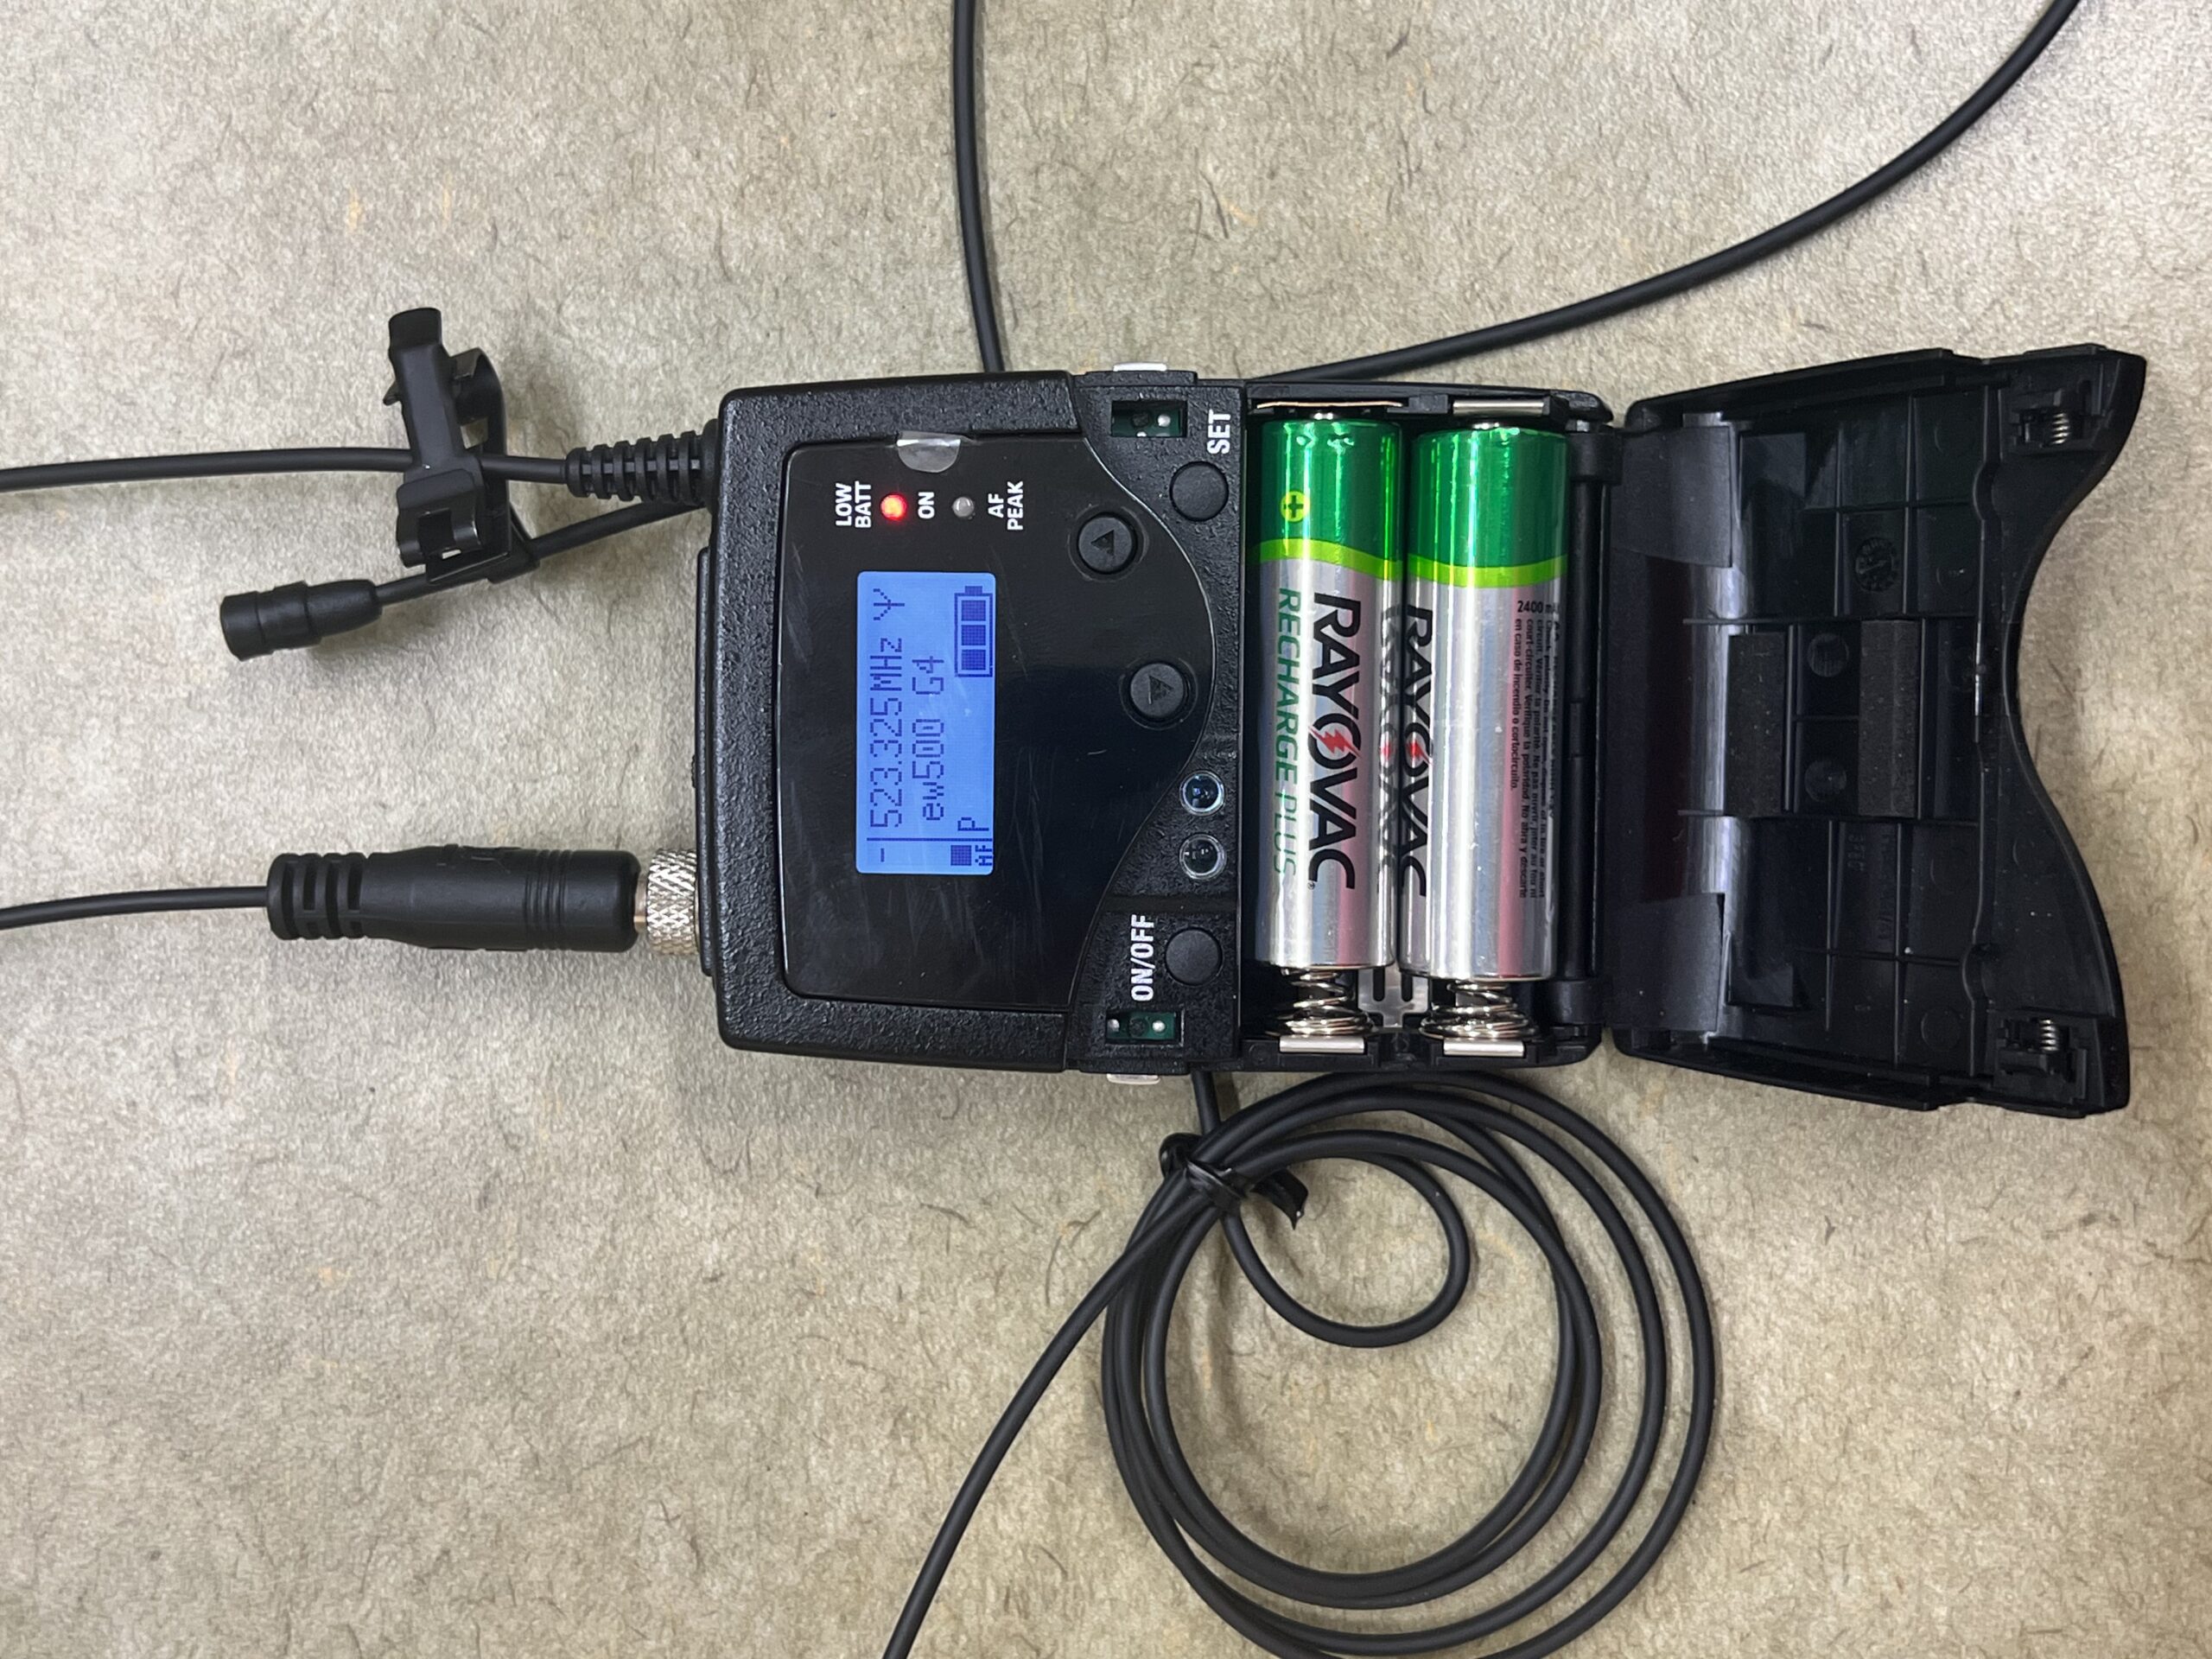
- There is currently only one wireless microphones available.
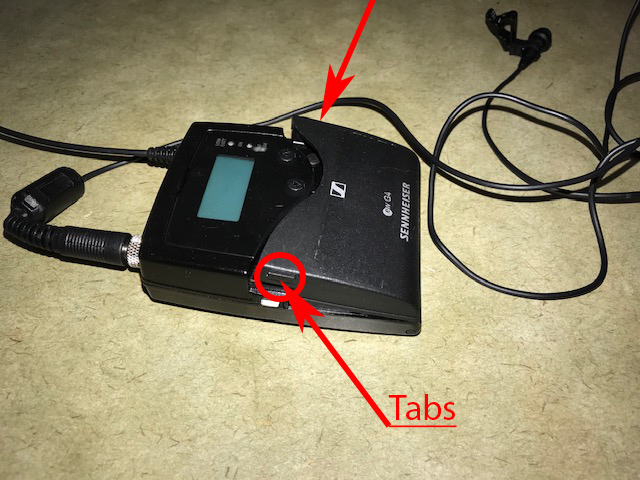
- Find the Sennheiser body pack wireless microphone.
- It should be on the lecture or in the lecture draw or even on the lectern demo tables to the right of the lectern. It depends where the last instructor left it. (See image )
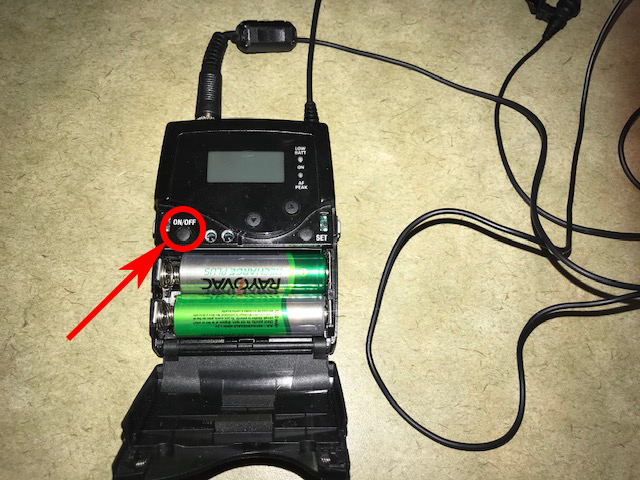
- To turn it on.